

Yoga Practice (Posture):
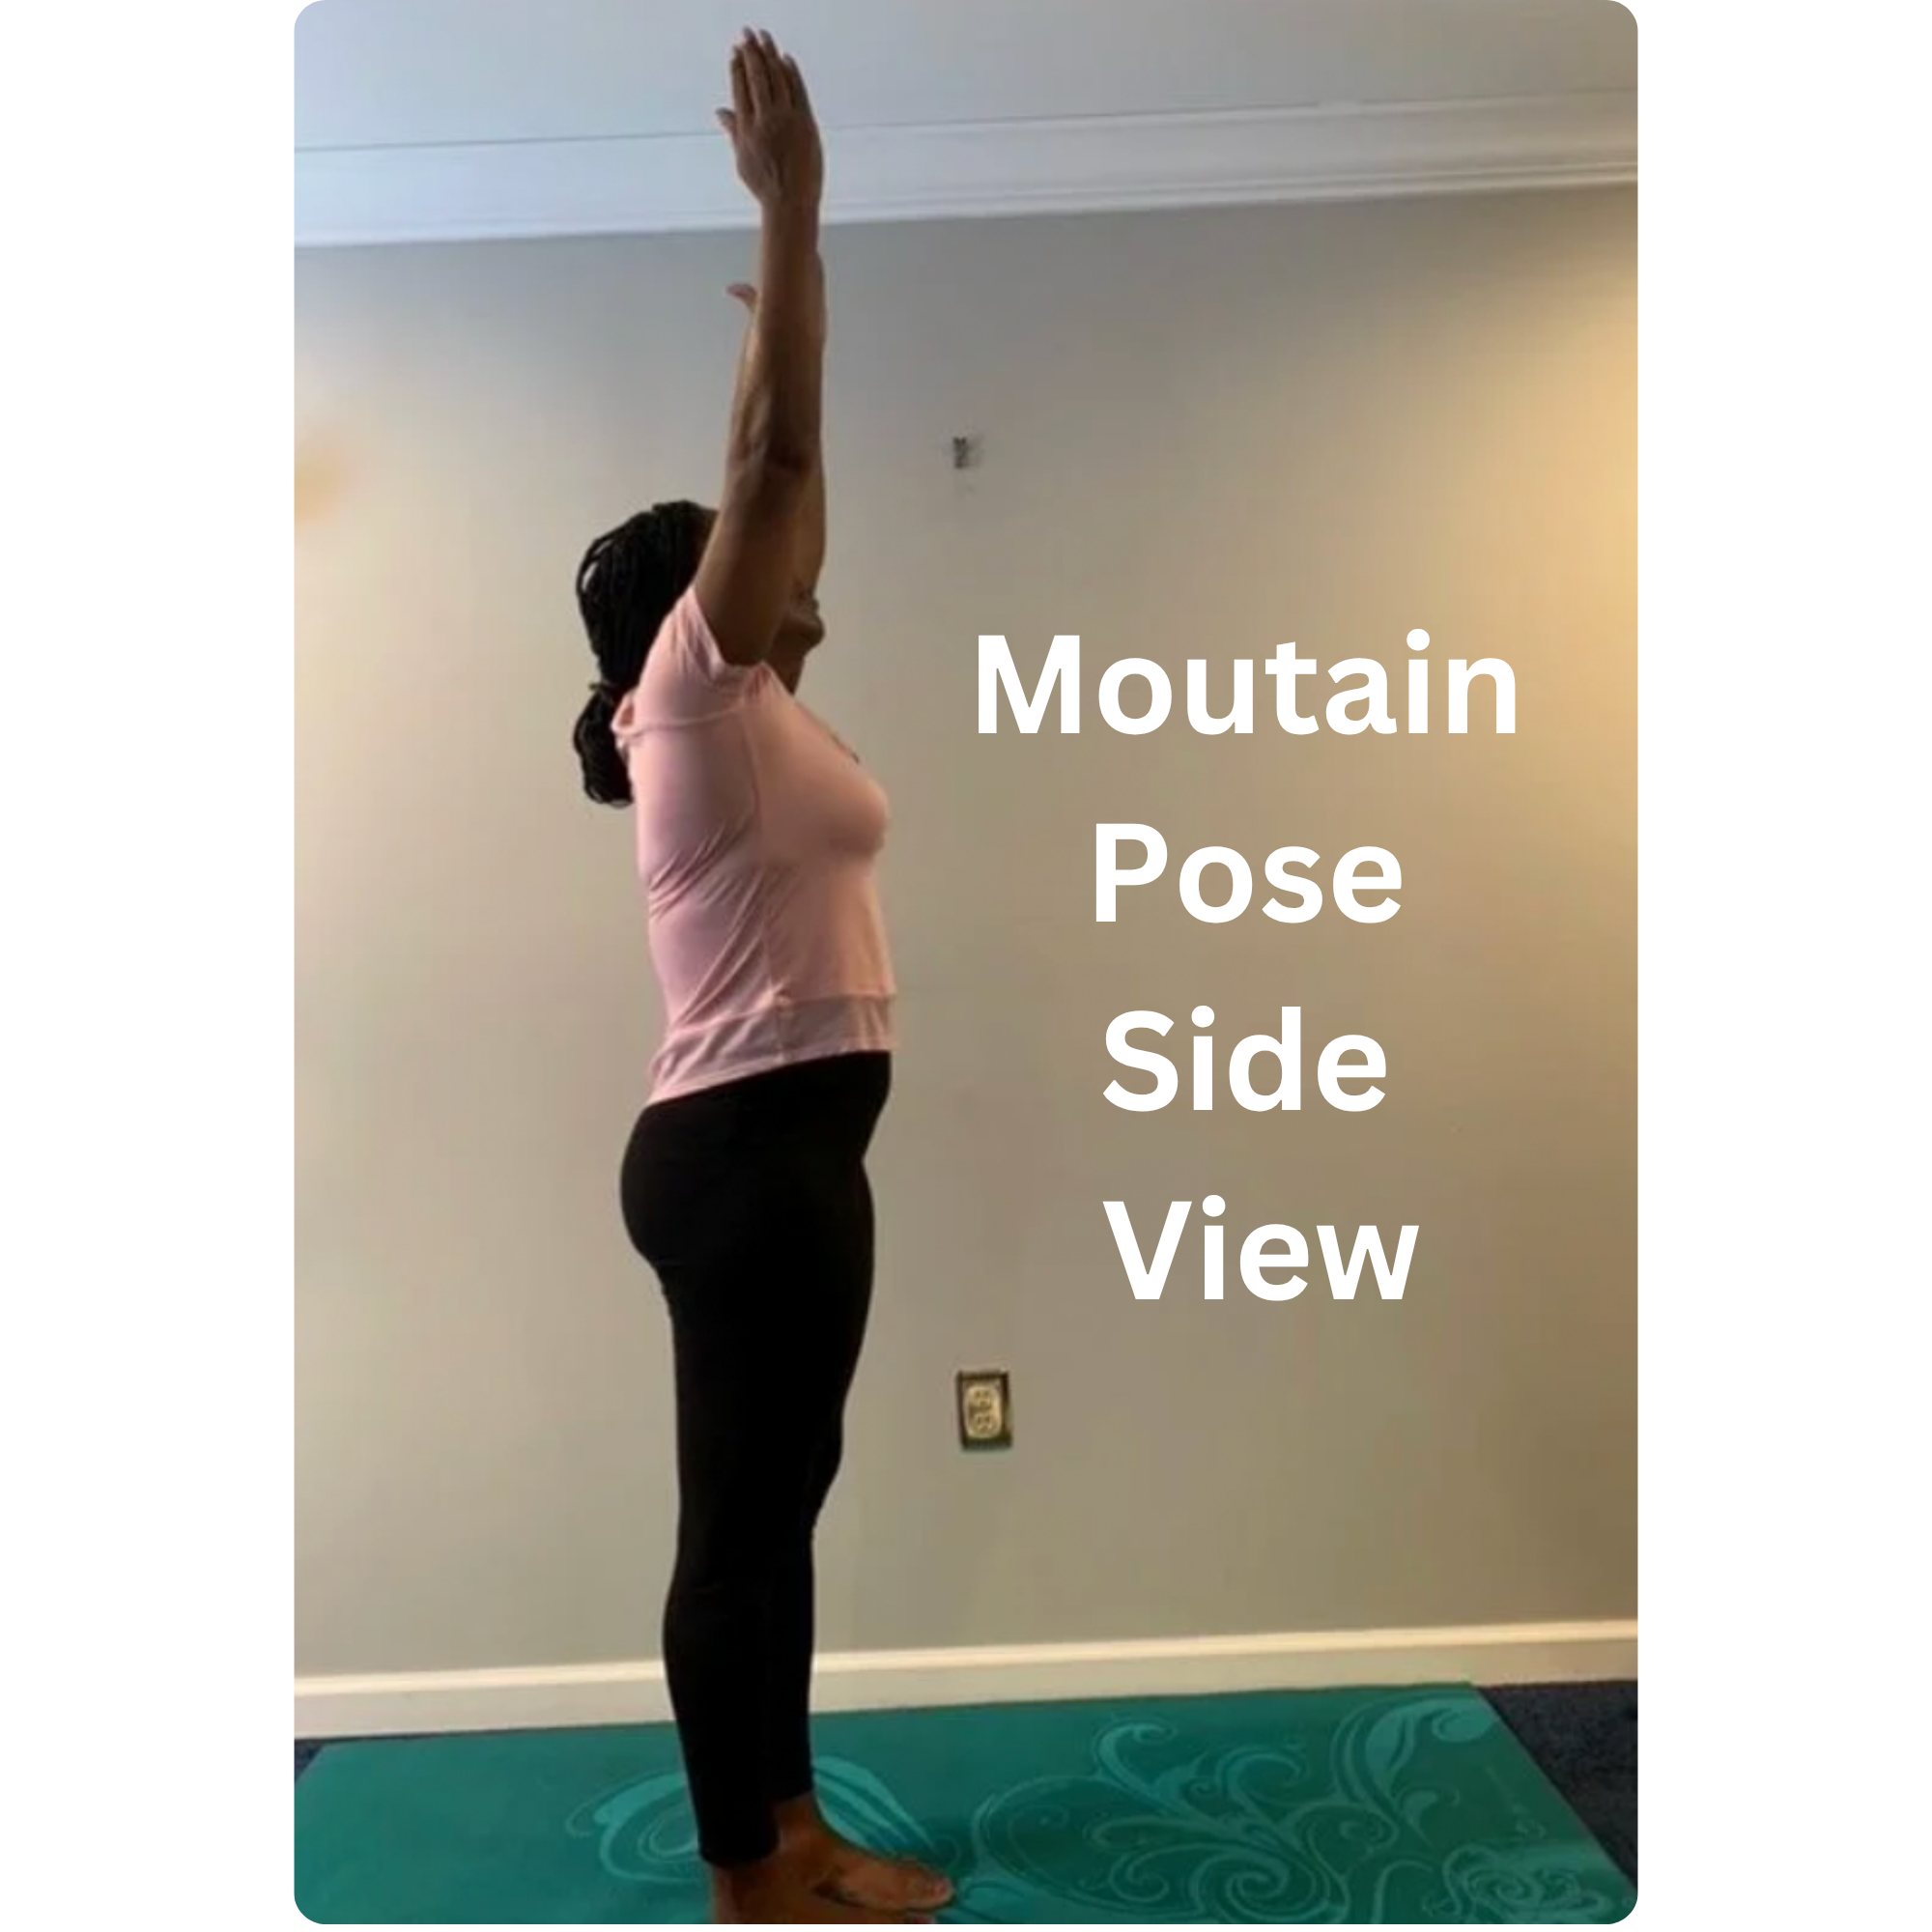
Mountain Pose
Mountain Pose
The Mountain Pose is a yoga posture that offers the potential to cultivate awareness of balanced joint space, establish a foundation of internal reflection, and bring the entire body into neutral alignment. Additionally, this pose offers the chance to develop balance and bodily awareness and help create and strengthen poise and confidence.

Improves posture and body alignment
Increases body awareness and mindfulness
Strengthens legs, core, and feet
Enhances balance and stability
Promotes steady, calm breathing
Builds a sense of grounding and presence
Supports focus and mental clarity
Helps reduce tension in shoulders and neck
Encourages proper weight distribution through the feet
Serves as a foundation for many other yoga poses
Instructions:
1. Stand with parallel feet, hip-width apart. Distribute weight evenly through the heels, inner and outer edges of each foot. Feel and imagine your center of gravity evenly between your feet.
2. Engage the front of the thighs to straighten the legs without locking or compressing the knees.
3. Lengthen through the spine by reaching down through the tail and up through the crown of the head, lifting the dome of the ribs from the bowl of the pelvis.
4. Roll the shoulders up, back and down, allowing them to rest on the roof of the ribs as you reach down through the fingertips.
5. Relax unhelpful and unnecessary effort. Feel and imagine the weight of the entire body traveling smooth down through the bones and into the ground, while the energy of your muscles travels up through the bones and toward the top of your head.
6. To release, gradually let go of any conscious effort to stand a certain way, and feel the difference within the body.
Stand tall like a mountain
Put your feet hip-width apart and press them evenly into the ground.Make your legs strong
Straighten your legs gently (don’t lock your knees) and feel steady.Grow tall through your body
Imagine a string pulling the top of your head up to the sky while your feet stay rooted down.Relax and breathe
Let your shoulders soften down, arms rest by your sides, and take slow, calm breaths.
Teaching Cues for Students
Implementation & Development
See our Child Development Page for more information to help tailor your instruction to best meet the needs of your students.
All children learn best given clear, concise, instructions, trying to reduce directional cues down to 4 steps.
Enjoys learning through games, songs, and stories. Cues for Balloon Breath can be incorporated into a song or a rhyme to make it more playful.
Focus: imagination, simplicity, sensory awareness
Use playful imagery (e.g., “stand like a strong mountain,” “roots growing into the الأرض”)
Keep instructions short, concrete, and 1 step at a time
Incorporate movement first, stillness second (e.g., wiggle → freeze like a mountain)
Emphasize sensory cues (“feel your feet pressing into the ground”)
Model the pose visually—learn by copying
Use call-and-response or games to maintain engagement
Keep holds brief (5–10 seconds) and repeat rather than sustain
Reinforce effort with positive, encouraging language
Still enjoy routine, learning through games, group activity. Appreciates praise and being noticed. Slightly longer attention spans, may be able to take in more instructions and longer practices.
Focus: body awareness, structure, beginning mindfulness
Introduce simple alignment cues (feet grounded, body tall, shoulders relaxed)
Use guided imagery + basic anatomy (“strong legs,” “long spine”)
Encourage noticing sensations (balance, breath, tension vs. relaxation)
Begin integrating breath awareness (slow inhale/exhale while holding pose)
Offer choice and autonomy (“try closing your eyes if you feel steady”)
Normalize wobbling—frame balance as practice, not perfection
Hold slightly longer (10–20 seconds) with gentle coaching
Connect to emotional regulation (“this pose can help you feel calm and steady”)
As adolescence begins and continues, students will start to feel preoccupied with body image. It is important to cultivate a safe space for students to practice where they don’t feel singled out and they have the option to close their eyes or to soften their gaze.
Focus: alignment, independence, mind-body connection
Provide more precise alignment cues (posture, muscle engagement, grounding)
Encourage internal awareness (body scan, subtle adjustments)
Integrate intentional breathing practices (slow, steady, controlled breath)
Link pose to stress management and self-regulation
Invite reflection (“what do you notice in your body or mind?”)
Promote ownership of practice (self-correcting, modifying as needed)
Allow for longer holds (20–60 seconds) with quiet focus
Use trauma-informed, choice-based language (opt in/out, eyes open/closed)


Video
Helpful Hints
More than simply standing, Mountain Pose provides an accessible space for students to explore key concepts that they’ll utilize throughout the practice: muscular stabilization, balanced joint space, pathways of weight, and internal bodily awareness.
Encourage a balance of ease and effort-tall but not rigid, relaxed but not supported.
Never overdo or force any yoga movement. If you begin to experience discomfort or pain, release the posture. Find a variation of the posture that serves your body and practice best.
Practice with self-compassion and non-judgement
Mountain pose can be done standing, sitting in a chair, or using a chair as a prop.
Precautions:
Injury or surgery to any weight-bearing joints: Adjust/ modify or avoid
Options:
Reaching Mountain: Standing in Mountain Pose, with an inhale, reach your arms out to the sides. At shoulder height, turn your palms upward and continue to reach your arms overhead. To release, on an exhale reach your arms out to the sides again, turning your palms down at shoulder height and bringing your arms back down to your sides.
Content from NYCDOE YMTP² curricular materials