

Yoga Practice (Warm-Up):
6 Movements of the Spine
6 Movements of the Spine
The 6 Movements of the Spine yoga warm-up sequence allows the spinal joints to move through fundamental movements of flexion, extension, lateral flexion, and rotation. These yoga movements engage and relax all of the supporting muscles of the spine and activates and relaxes accessory breathing muscles.

Takes spine through all of its fundamental movements
Engages and relaxes all of the supporting muscles of the spine
Activates and relaxes accessory breathing muscles
Instructions:
Flexion & Extension:
1. Inhale your arms out to the side and overhead. Interlace your fingers and turn the palms up. Exhale to tilt the hips back and round the spine forward, pressing the palms forward or down towards the ground.
2. Inhale and rise back up, then exhale to circle the arms around behind your back, either interlacing fingers, or pressing hands against the lower back for support.
3. Inhale to tilt the pelvis and lift the chest up and back, keeping the neck comfortable ad supported. Exhale to release the arms and return to an easy seat and neutral spine.
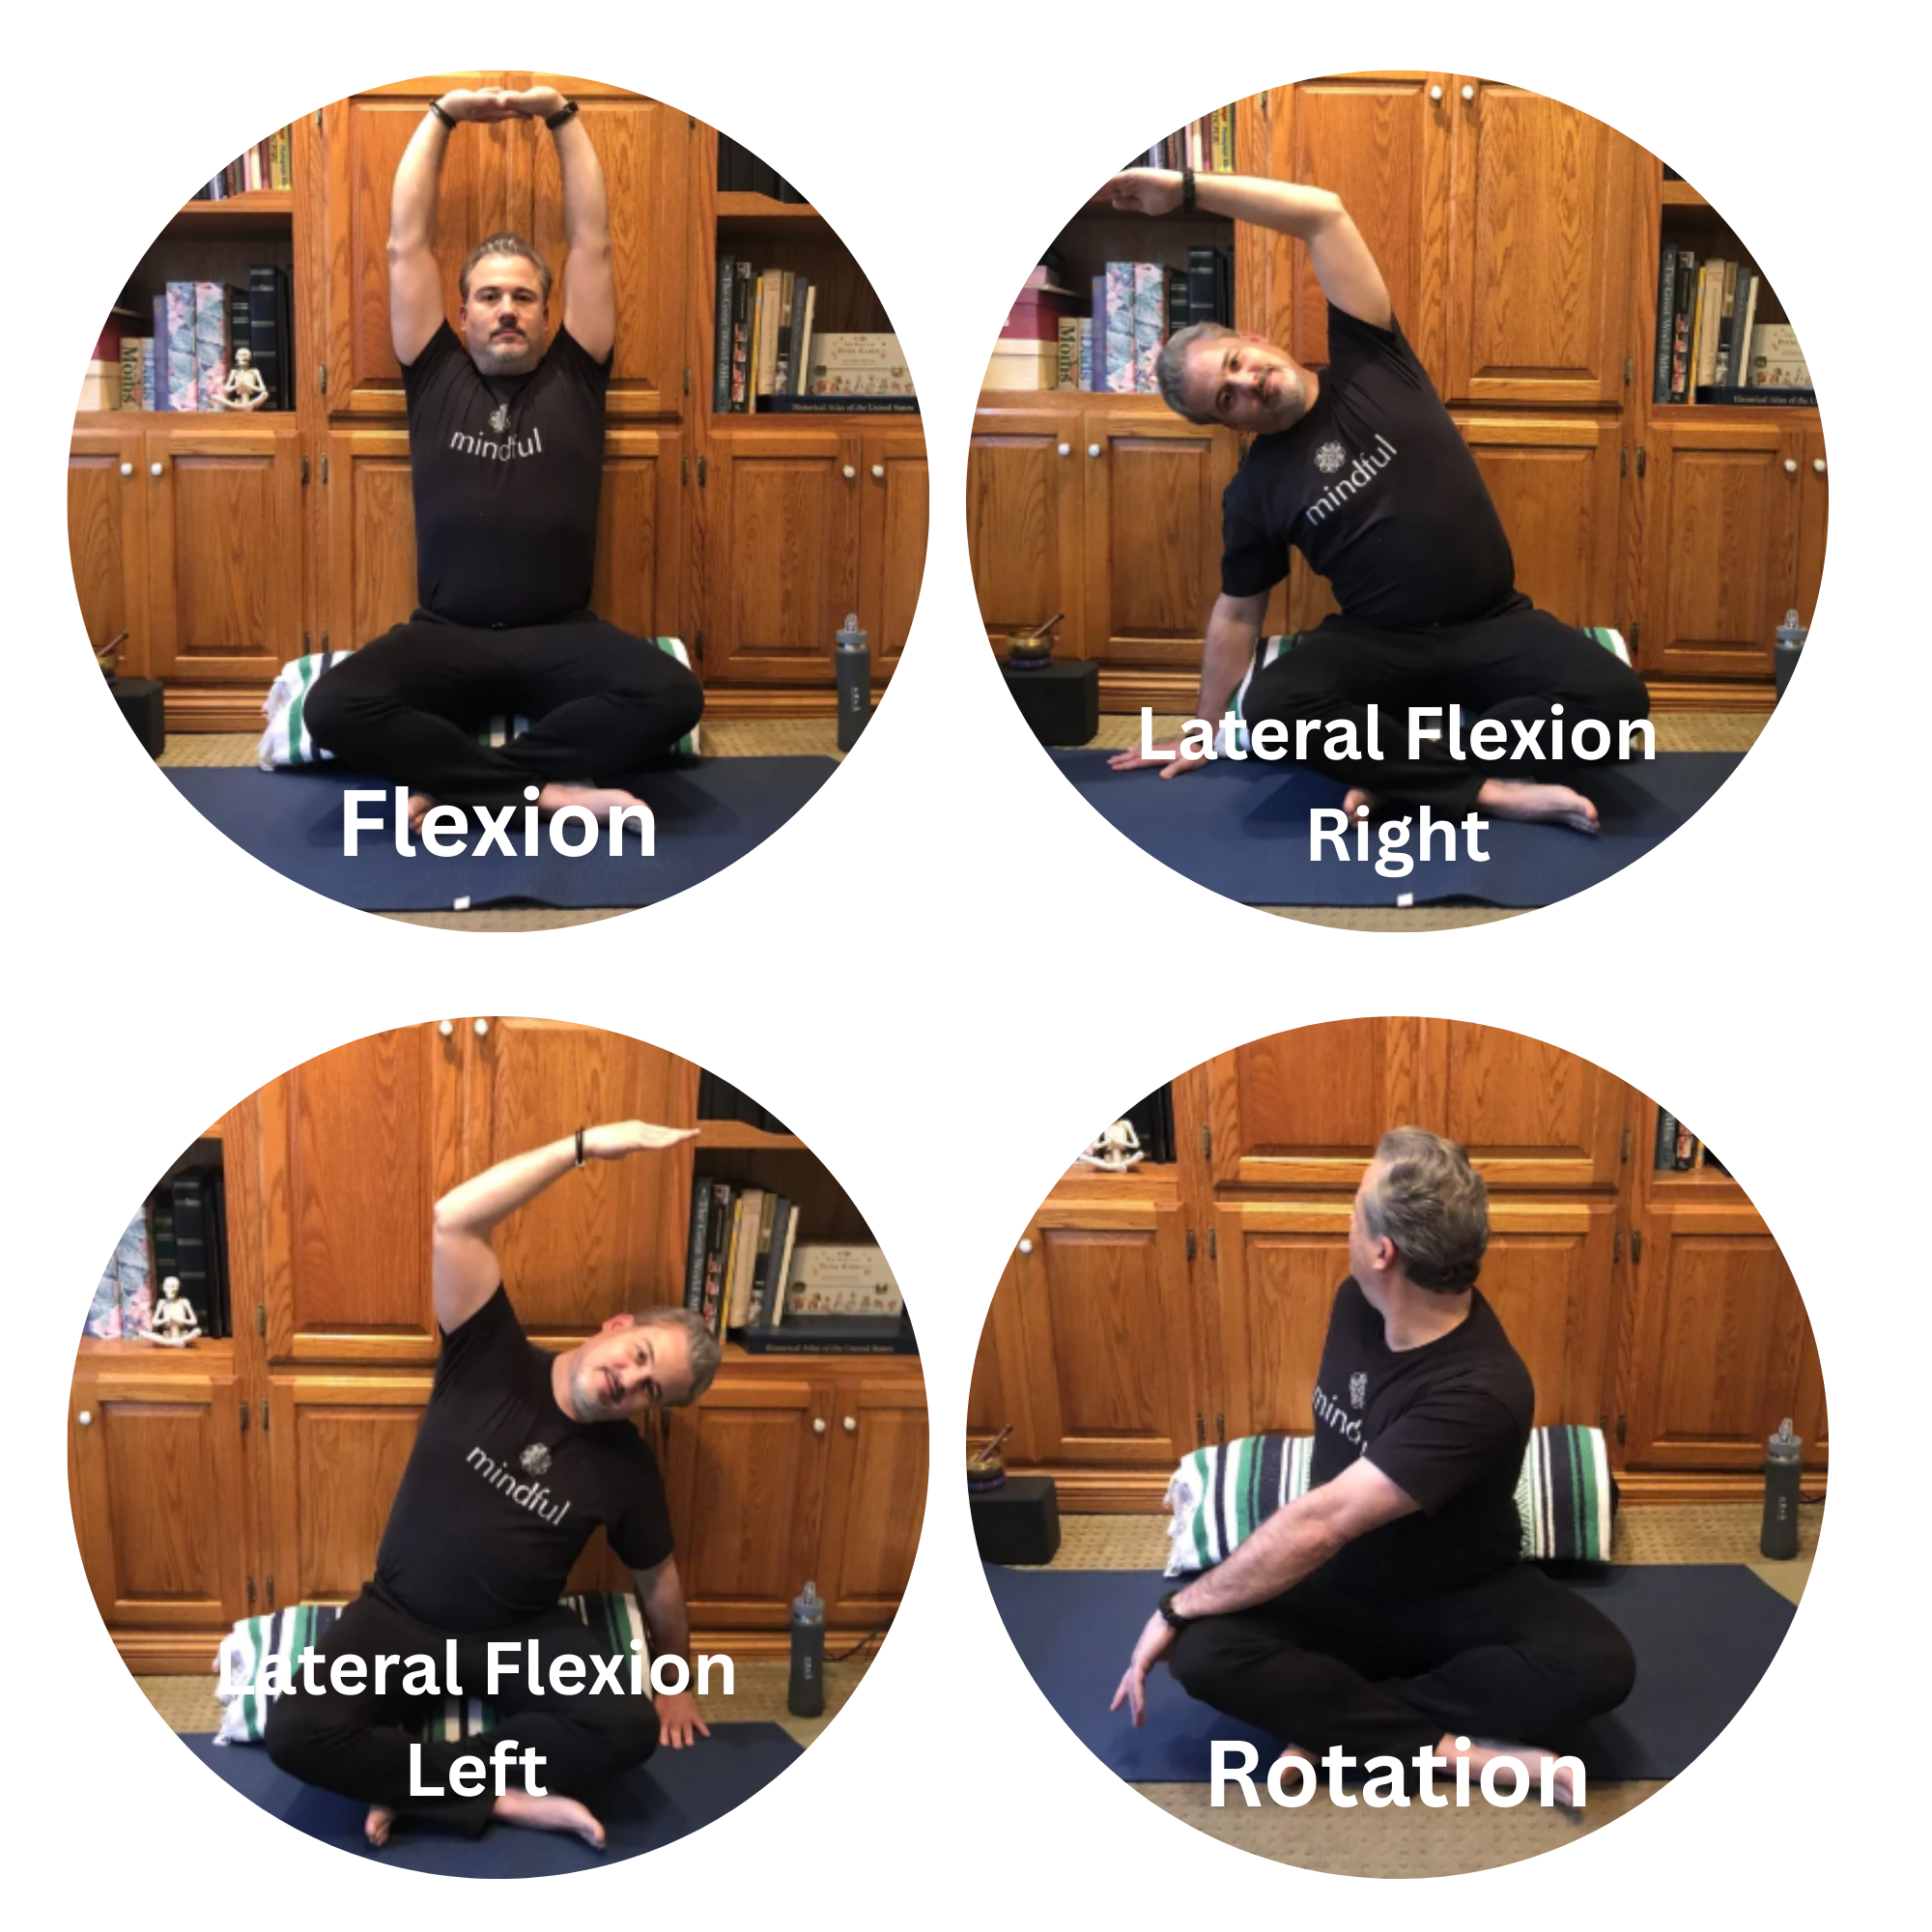
Lateral Flexion:
1. Inhale your arms out to the side and overhead. Exhale your right hand or forearm to the floor as the left arms extends to stretch the left side of the body.
2. Inhale both arms overhead, returning to center. Exhale your left hand or forearm to the floor as the right arm extends to stretch the right side of the body.
3. Inhale both arms overhead, returning to center. Exhale to release the arms and return the arms and return to an easy seat and neutral spine.
Rotation:
1. Inhale your arms out to the side and overhead. On an exhale, turn your torso to the right and float the arms down, resting the hands where they land or using them for support on the knee in front and the floor behind.
2. Inhale both arms overhead, returning to center. On an exhale, turn your torso to the left and float the arms down, resting the hands where they land or using them for support on the knee in front and the floor behind.
3. Inhale both arms overhead, returning to center. Exhale to release the arms and return to an easy seat and neutral spine.
1. Round & Lift (Forward and Back)
Breathe in, lift your arms up.
Breathe out, round your back and lean forward.
Breathe in, lift your chest up.
Breathe out, sit tall again.
2. Side Bend Right
Breathe in, lift your arms.
Breathe out, lean to the right and stretch the left side.
Breathe in, come back to center.
3. Side Bent Left
Breathe in, lift your arms.
Breathe out, lean to the left and stretch the right side.
Breathe in, come back to center.
4. Twist Right
Breathe in, lift your arms.
Breathe out, gently twist to the right.
Breathe in, come back to center.
5. Twist Left
Breathe in, lift your arms.
Breathe out, gently twist to the left.
Breathe in, come back to center.
6. Sit Tall & Pause
Sit tall, relax your arms, and take a few easy breaths.
Teaching Cues for Students
Implementation & Development
See our Child Development Page for more information to help tailor your instruction to best meet the needs of your students.
All children learn best given clear, concise, instructions, trying to reduce directional cues down to 4 steps.
Enjoys learning through games, songs, and stories. Cues for Balloon Breath can be incorporated into a song or a rhyme to make it more playful.
Use simple, rhythmic language (“Up like a balloon… curl like a turtle”).
Model movements big and slow; invite kids to copy rather than correct.
Pair breath with sound cues (inhale = “smell the flower,” exhale = “blow the pinwheel”).
Keep movements short and playful (1 round each direction is enough).
Use imagery for directions:
Side bends = “rainbow stretch”
Twists = “look behind your tail”
Offer choice: arms up or hands on belly/knees.
End with a very brief pause (2–3 breaths) using grounding language (“Feel your body on the chair”).
Still enjoy routine, learning through games, group activity. Appreciates praise and being noticed. Slightly longer attention spans, may be able to take in more instructions and longer practices.
Introduce clear breath–movement pairing (“Inhale to lift, exhale to move”).
Name body parts simply (spine, shoulders, ribs) to build body literacy.
Encourage gentle effort—no pushing or forcing the stretch.
Invite students to notice sensations (“Where do you feel the stretch?”).
Normalize variation: “Your twist may look different than your neighbor’s.”
Use counted breaths (1 breath per movement).
Pause at the end to notice calm, focus, or energy level.
As adolescence begins and continues, students will start to feel preoccupied with body image. It is important to cultivate a safe space for students to practice where they don’t feel singled out and they have the option to close their eyes or to soften their gaze.
Frame movements as tools for focus, stress relief, or reset.
Use neutral, non-childish language and offer opt-in participation.
Emphasize self-pacing and consent (“Move only within your comfort range”).
Cue breath with choice-based language (“If it feels okay, exhale into the twist”).
Encourage internal awareness (breath, tension, ease) rather than appearance.
Allow eyes open or closed; seated or standing modifications welcome.
End with a pause to reflect silently or notice readiness to learn.


Video
Helpful Hints
Never overdo any breathing exercise or force your breath into a pattern that is uncomfortable. If you begin to feel anxious or lightheaded, stop practicing and breathe normally.
Practice with self-compassion and non-judgement
6 Movements of the Spine can be done from a seated or standing.
Variations
Standing Variation: The six movements of the spine can also be done from a standing position, with substantially the same. Instructions.
Content from NYCDOE YMTP² curricular materials